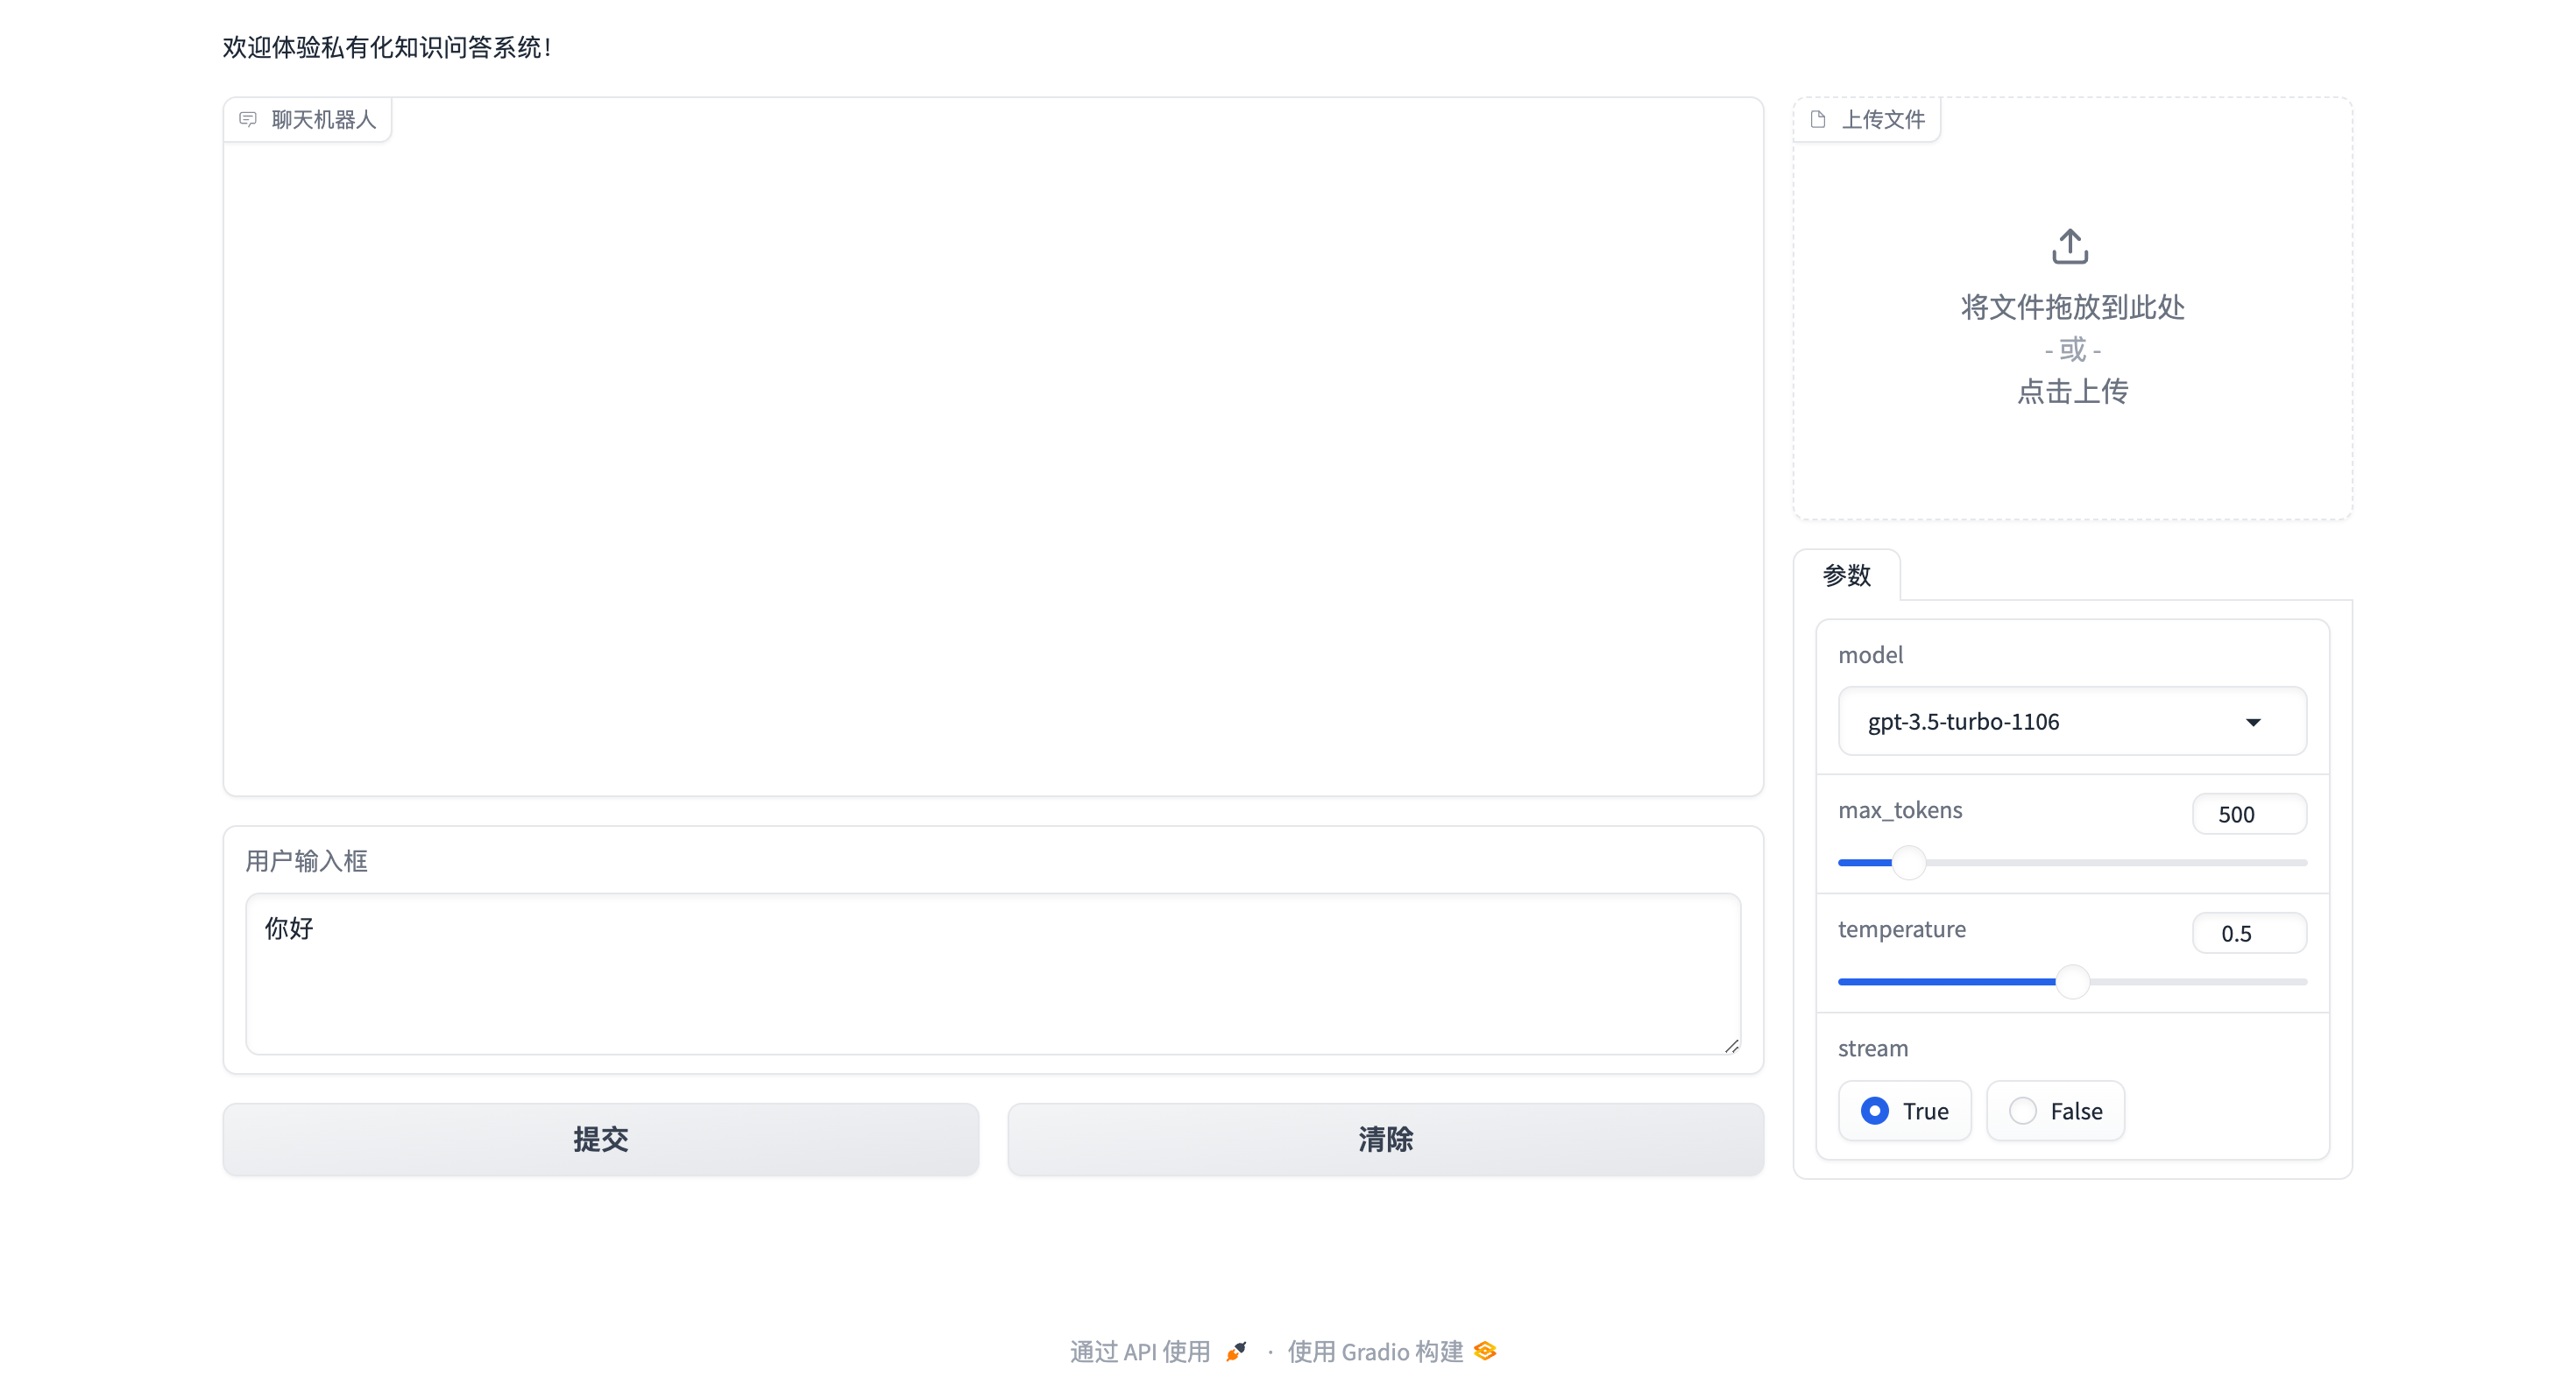
基于gradio的chatbot 基于gradio对chatbot做一个网页可视化,可以通过网页端,更换模型,以及调整模型的一些参数。
Gradio 是一个开源 Python 软件包,可让快速为机器学习模型、API 或任意 Python 函数构建演示或 Web 应用程序。然后,您可以使用 Gradio 的内置共享功能在几秒钟内通过公共链接分享您的演示。
gradio快速入门 ps(一手资料永远是最香的)
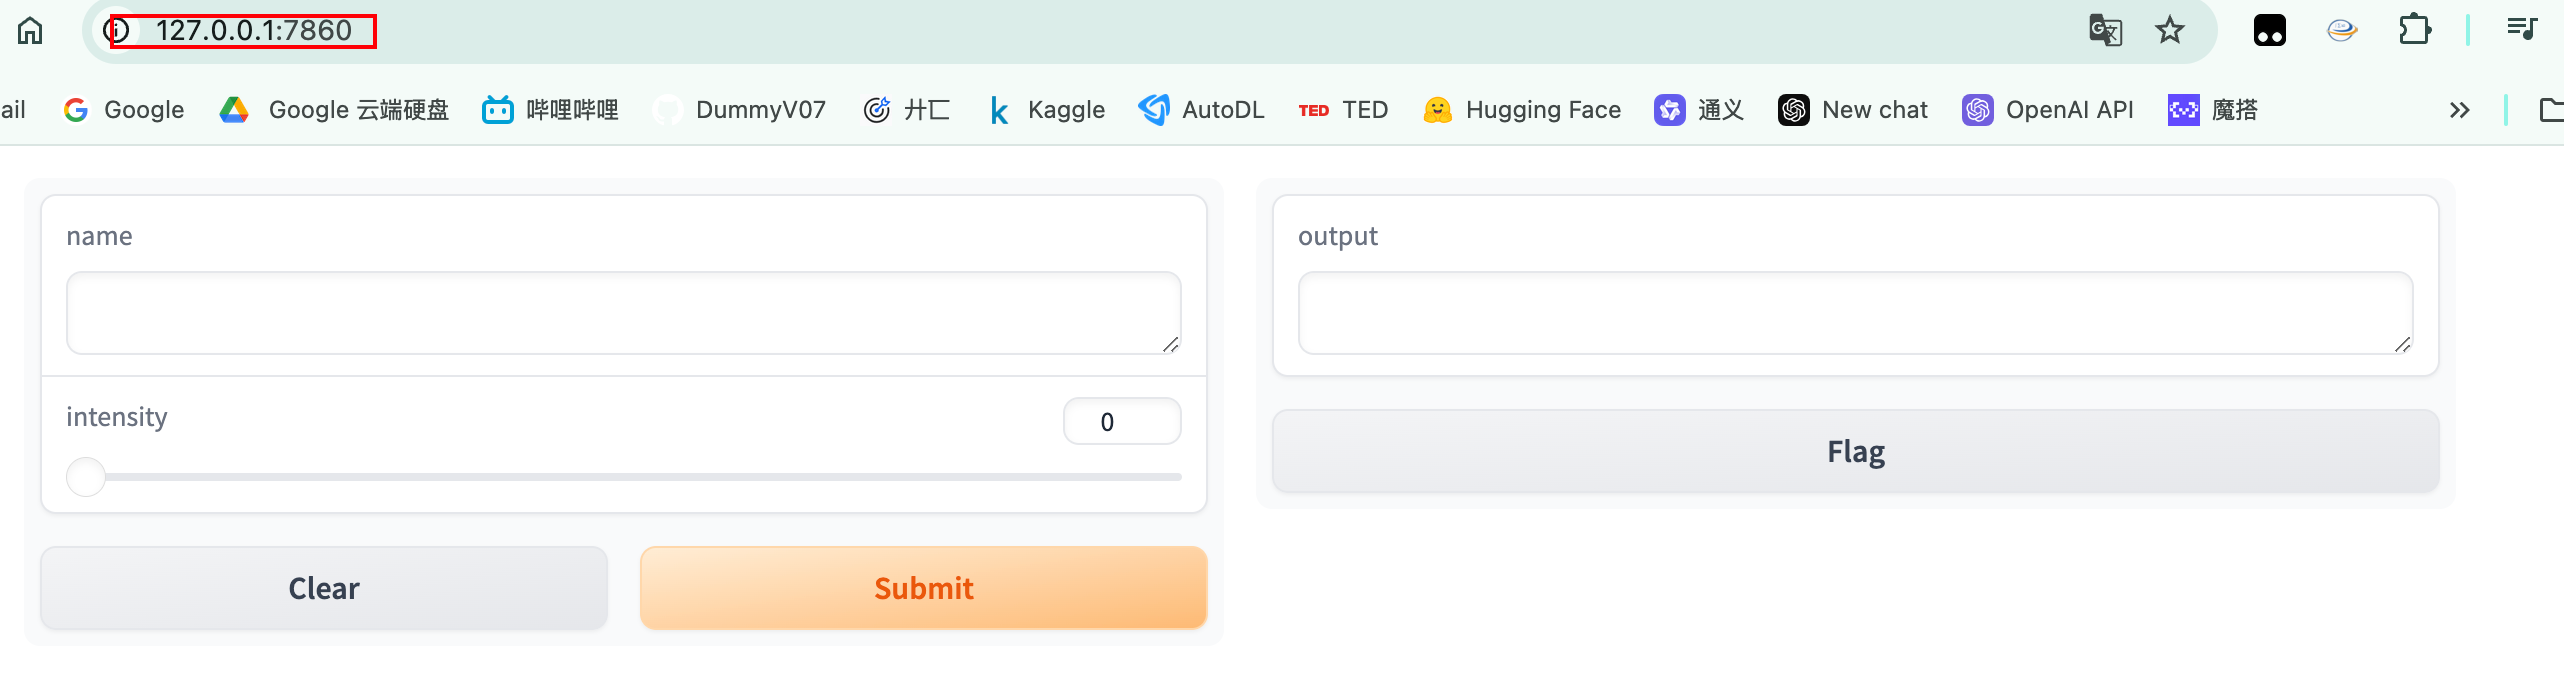
常用功能记录 1 2 3 4 5 6 7 8 9 10 11 12 13 14 15 16 17 import gradio as gr def greet (name, intensity ): return "Hello, " + name + "!" * int (intensity) demo = gr.Interface( fn=greet, inputs=["text" , "slider" ], outputs=["text" ], ) demo.launch()
社区组件 :社区组件也会有一些现成的案例,我们可以在此基础上进行修改来完成自己的项目。
1.布局 1.1 列和行 1 2 3 4 5 6 7 8 9 10 11 12 13 14 15 16 17 18 19 import gradio as grwith gr.Blocks() as demo: with gr.Row(): text1 = gr.Textbox(label="t1" ) slider2 = gr.Textbox(label="s2" ) drop3 = gr.Dropdown(["a" , "b" , "c" ], label="d3" ) with gr.Row(): with gr.Column(scale=1 , min_width=300 ): text1 = gr.Textbox(label="prompt 1" ) text2 = gr.Textbox(label="prompt 2" ) inbtw = gr.Button("Between" ) text4 = gr.Textbox(label="prompt 1" ) text5 = gr.Textbox(label="prompt 2" ) with gr.Column(scale=2 , min_width=300 ): img1 = gr.Image("images/cheetah.jpg" ) btn = gr.Button("Go" ) demo.launch()
1.2 填充浏览器高度/宽度 要通过移除侧边距来让应用占据浏览器的整个宽度,请使用gr.Blocks(fill_width=True)。
1 2 3 4 import gradio as grwith gr.Blocks(fill_height=True ) as demo: gr.Chatbot(scale=1 ) gr.Textbox(scale=0 )
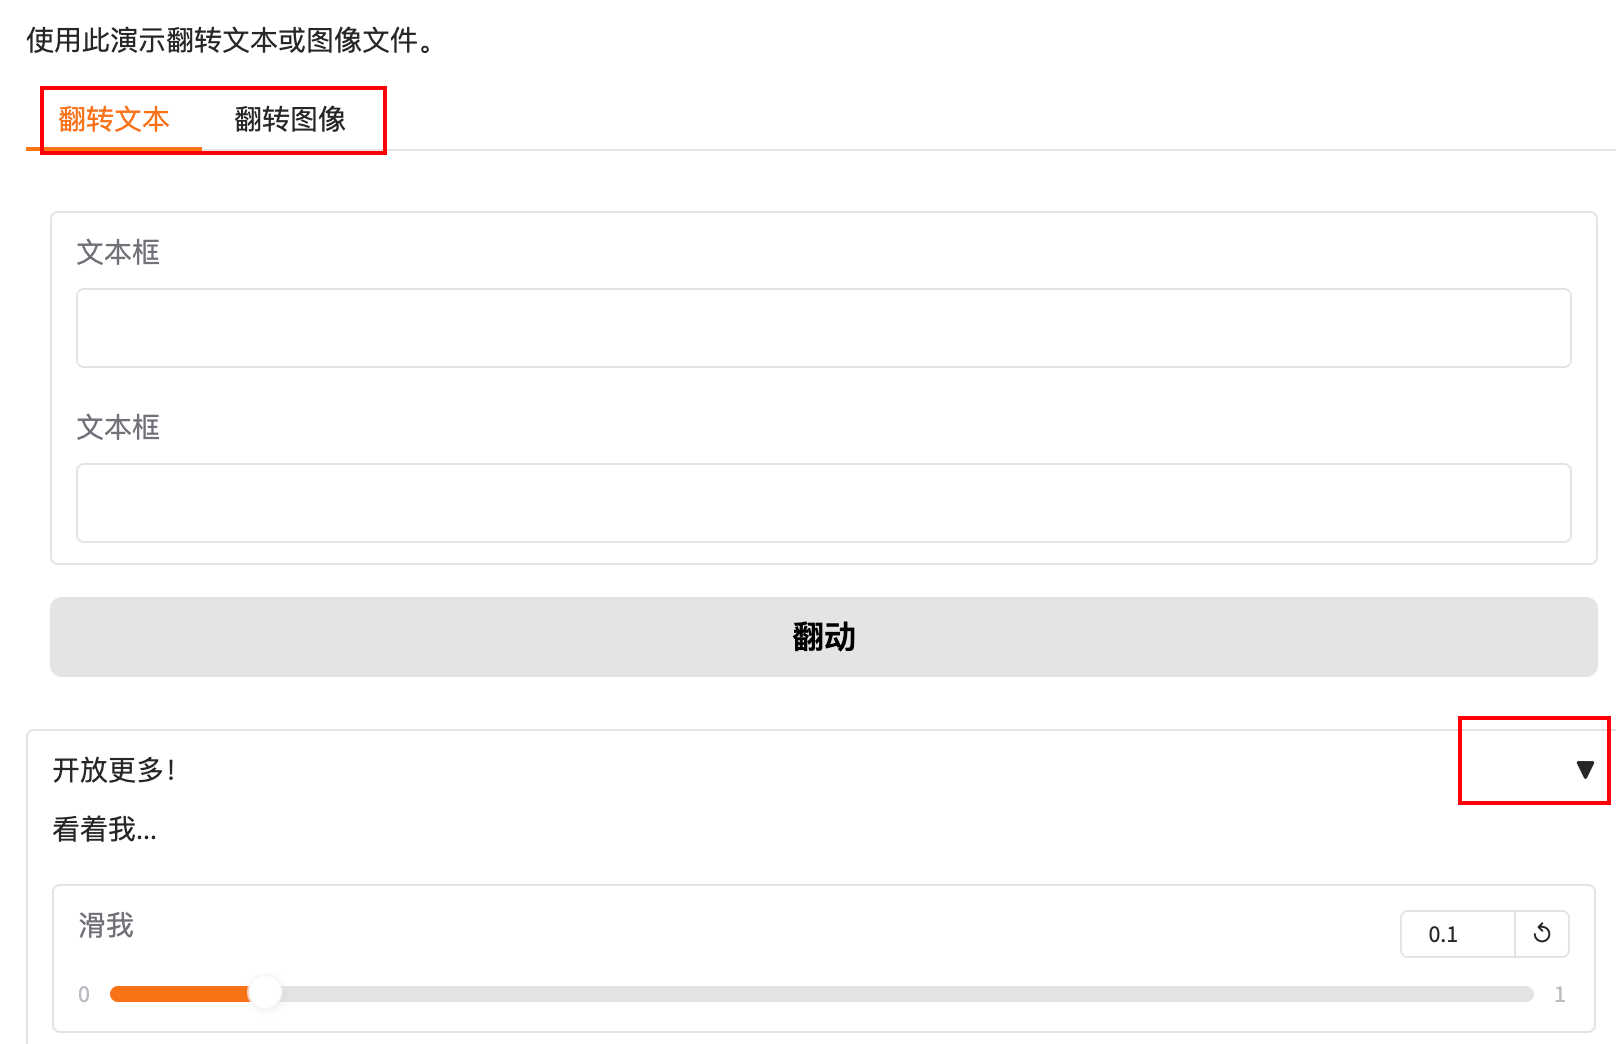
1.3 标签和折叠面板 使用with gr.Tab(‘tab_name’):子句创建选项卡。在上下文中创建的任何组件with gr.Tab(‘tab_name’):都会出现在该选项卡中。连续的选项卡子句组合在一起,以便一次可以选择一个选项卡,并且仅显示该选项卡上下文中的组件。
Accordion 是一种可以切换打开或关闭的布局。与 一样Tabs,它是一个可以选择性隐藏或显示内容的布局元素。
1 2 3 4 5 6 7 8 9 10 11 12 13 14 15 16 17 18 19 20 21 22 23 24 25 26 27 28 29 30 31 32 33 34 35 36 import numpy as npimport gradio as grdef flip_text (x ): return x[::-1 ] def flip_image (x ): return np.fliplr(x) with gr.Blocks() as demo: gr.Markdown("Flip text or image files using this demo." ) with gr.Tab("Flip Text" ): text_input = gr.Textbox() text_output = gr.Textbox() text_button = gr.Button("Flip" ) with gr.Tab("Flip Image" ): with gr.Row(): image_input = gr.Image() image_output = gr.Image() image_button = gr.Button("Flip" ) with gr.Accordion("Open for More!" , open =False ): gr.Markdown("Look at me..." ) temp_slider = gr.Slider( 0 , 1 , value=0.1 , step=0.1 , interactive=True , label="Slide me" , ) text_button.click(flip_text, inputs=text_input, outputs=text_output) image_button.click(flip_image, inputs=image_input, outputs=image_output) demo.launch()
2. 组件属性 gradio有很多有用的组件,都可以在官方文档中找到 ,在有需要的时候可以进行查询
1 2 3 4 5 6 7 8 9 10 11 12 gr.Chatbot(label="聊天机器人" ) gr.Button("提交" ) gr.File(label="上传文件" ) gr.Dropdown() gr.Slider() gr.Radio()
3.功能函数 当我们构建好布局和组件之后,我们需要对每个组件进行一些功能定义,比如我们点击按钮之后应该出发什么事件。
1 2 3 4 5 6 7 8 9 10 11 12 submit_btn.click( fn=fn_prehandle_user_input, inputs=[user_input_textbox, chatbot], outputs=[chatbot] ).then( fn=fn_predict, inputs=[user_input_textbox, chatbot, model_dropdown, max_tokens_slider, temperature_slider, stream_radio], outputs=[chatbot] )
gradio的基础使用大概就是这样,要完成实现基于gradio的chatbot,还需要接入LLM,这里使用openai的api导入gpt模型进行测试,后续会接入本地模型,以及数据库,完成rag的构建
项目记录 https://github.com/DummyV07/ChatBot_Gradio